This post describes installing snort-2.9.20 on Windows 10 Enterprise. Download the executables from the below url’s.
Snort download- https://www.snort.org/downloads/snort/Snort_2_9_20_Installer.x64.exe
Npcap download- https://npcap.com/dist/npcap-1.72.exe
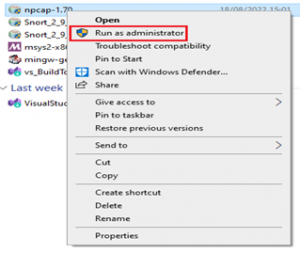
1.Installing snort first requires you to install Npcap in administrator mode. Go to the folder where the Npcap executable is placed and right-click the executable and select the option ‘Run as administrator’.
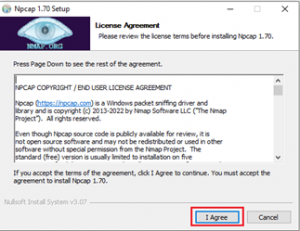
2. The License Agreement window appears. Click ‘I Agree’ to continue
3. In the next window it shows Installation options. Tick all three components in the Installation options wizard as below.
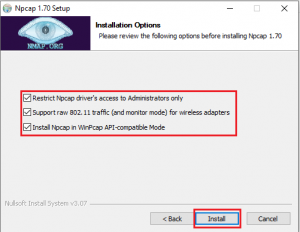
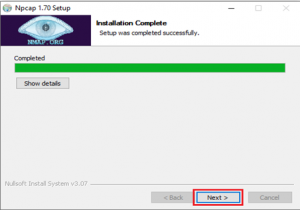
4. Next click ‘Install’ so that the Npcap installation process can begin. Once the installation process is complete you will be prompted with an installation complete window.
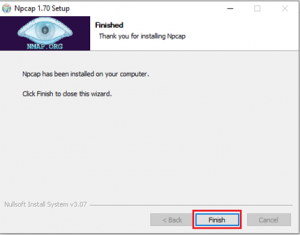
5. Click the ‘Next’ button which will take you to a new wizard saying your Npcap installation is finished.
6. Click ‘Finish’ to exit the installation.
Once Npcap is installed we are now going with the installation of Snort.
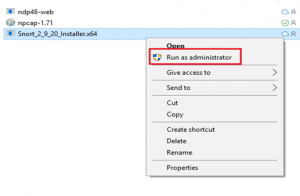
1. Go to the folder where the snort executable is placed and right-click the executable and select the option ‘Run as administrator’.
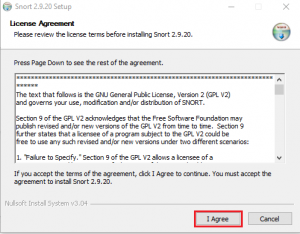
2.You are presented with the GNU General Public License agreement. Once you have read and accepted the terms of the agreement, click ‘I Agree’.
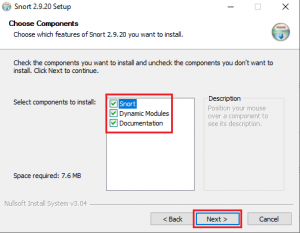
3. The next screen allows you to choose the Snort components that you wish to install. You can see the description by dragging your mouse over each component. By default, all components are selected. Click ‘Next’.
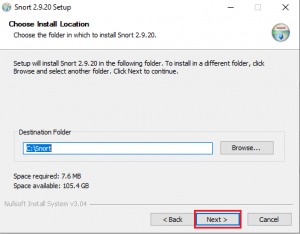
4. The next screen allows you to choose an install location for Snort. The default location is ‘C:\Snort’. You may select a different location by typing directly into the Destination Folder area, or by choosing Browse and selecting a location.
5. Click next and it will start with the installation.
6. Once the installation is complete it will show a window with a message saying Completed.

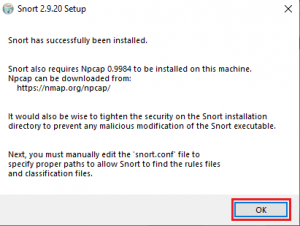
7. Click on the close button and you are prompted with a dialog box saying, ‘snort has successfully been installed’.
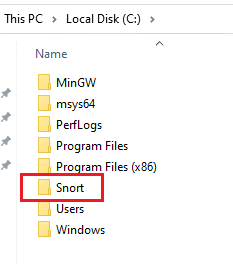
8. Navigate to the Local C drive and we can see that a new folder with the name ‘Snort’ is created which has all the snort files.
After the installation of Snort and Npcap, we can check whether both are running as expected.
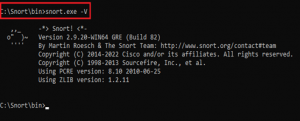
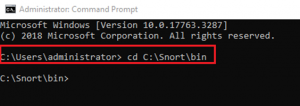
1. Open the command prompt in administrative mode and navigate to the directory where the snort is installed. The default location is ‘C:\Snort’.
2. The snort executable is in the ‘bin’ directory. once inside the bin directory, you can run the executable. Here we are checking the installed version of the snort using the command option ‘-V’.