Installing NXLOG
Configuring Nagios starts with installing the NXLOG enterprise agent in the snort server and configuring it to pull out the logs from the snort server to the Nagios Log server. NXlog enterprise edition can be downloaded directly from the Nagios NXlog website. Download the executable into the appropriate directory and then perform the below steps to install it.
1. Extract the contents of the archive
#tar -xf nxlog-v5.6.7727_rhel7.x86_64.tar.bz2
2. Step 2 requires changing the NXlog user and group for the installation. This is done by creating environment variables directly as below.
#export NXLOG_USER=nxlog
#export NXLOG_GROUP=nxlog
During installation, a new user and a new group will be created based on these environment variables. They will be used for User and Group directives in nxlog.conf, and for the ownership of some directories under /opt/nxlog. Specifying an already existing user or group is not supported. The created user and group will be deleted on NXlog removal.
Step 3- Download the public key file from the NXlog public contrib repository and import it to the RPM database
# wget https://gitlab.com/nxlog-public/contrib/-/raw/master/PGP-public-key/nxlog-pubkey.asc?inline=false
Step 4- Import the downloaded public key file to RPM database
# rpm –import nxlog-pubkey.asc
step 5- install dependencies and NXlog using the yum
#yum install -y epel-release
#yum install nxlog-v5.6.7727_rhel7.x86_64.rpm
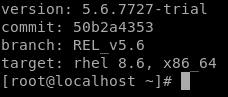
Step 6- Check the install using the command and you will see something similar
#/opt/nxlog/bin/nxlog -V